How to Make a Music Video for Rap: A 7-Shot Plan
How to make a music video for a rap hook: plan 7 shots, rehearse one performance, choose filming or AI footage, edit to the recording, and check the final export.
You have a finished hook, a phone, and one free afternoon. The recording plays while you pace around a room trying to imagine a video. Start by choosing the exact thirty seconds you want someone to watch. Learning how to make a music video becomes manageable when every shot has a job inside that small section.
This plan uses an original example hook about coming home after a late shift. It can be filmed with a phone and a consenting performer. You can also use a generated performance as one source of footage, then assemble your edit separately. The plan does not depend on a camera model, an expensive location, or a promise that synthetic lip movement will match a dense verse perfectly.
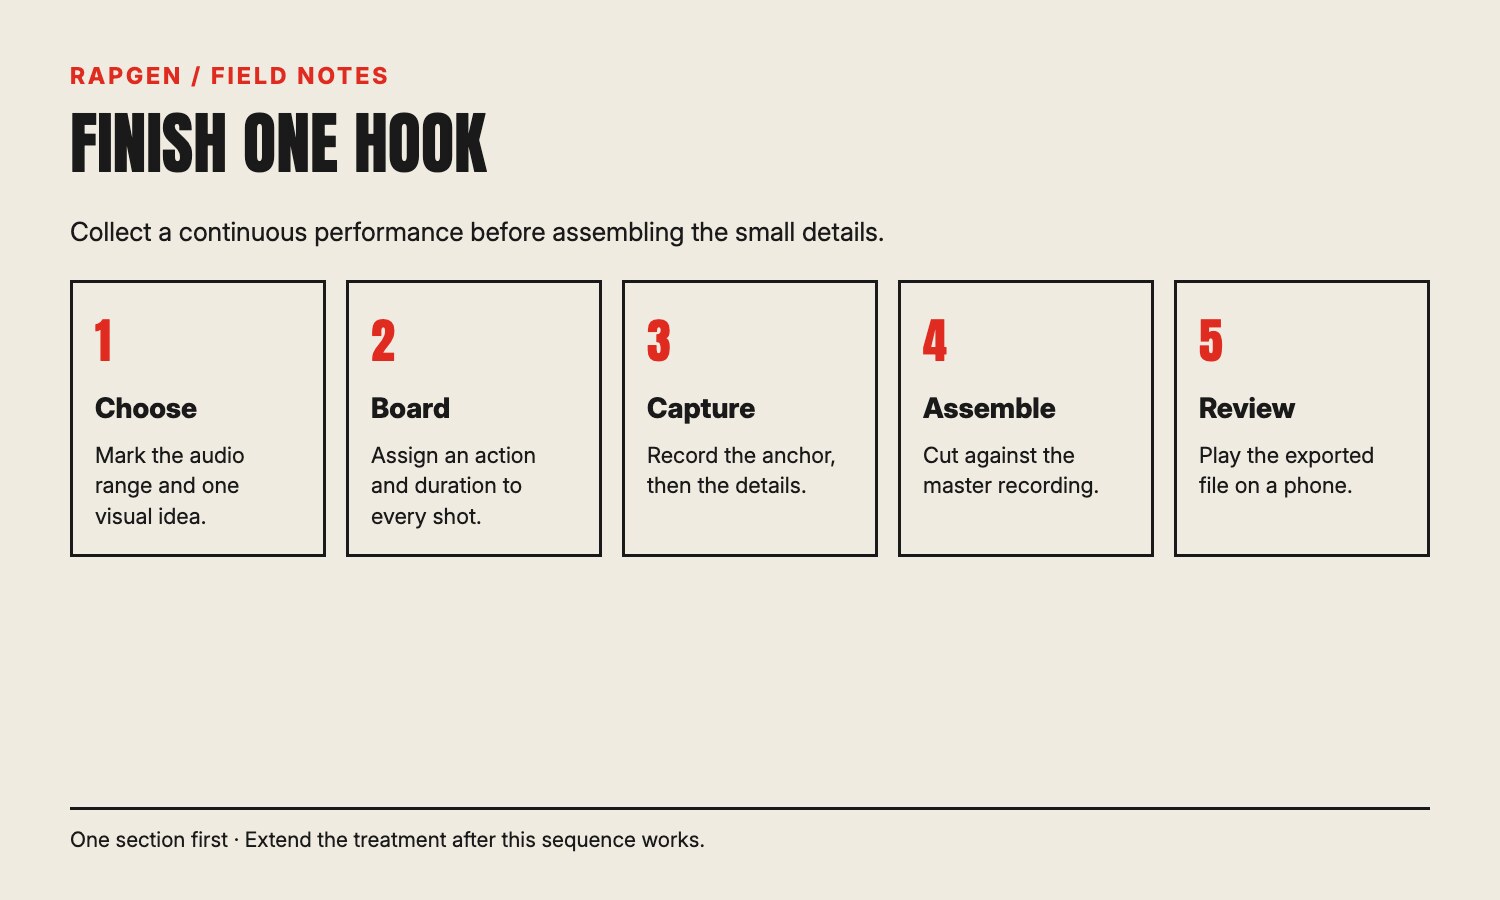
By the end, you should have a time range, a seven-shot board, one complete anchor take, and a checklist for deciding whether the export is ready. Finish that sequence before extending the treatment to a whole track.
1. Select the section and write its one-sentence idea
Play the recording with a timer and mark the beginning and end of the section. Listen for a phrase that feels complete. Starting halfway through a setup makes the first seconds carry a problem the viewer cannot hear. Ending before the answering line can make the clip feel unfinished even if the visual edit is polished.
For this exercise, the central phrase is: “Keys on the counter, but my mind's still at work.” The video idea is: “A performer gets home, then gradually leaves the shift behind.” There is a visible action at the beginning and a change at the end. That gives the edit a direction.
You do not need every lyric to become a prop. A counter, a key ring, and a jacket can represent the transition. If the following line mentions a bus, the video can stay in the room. Literal illustration of every noun often sends a small production through more locations than it can handle.
Make a section card
Write the file name, the chosen time range, the opening lyric, the closing lyric, and the idea on one card. Use the actual recording when measuring the duration. Thirty seconds is the length of our example board; your musical phrase may need a different length, in which case recalculate the board.
Decide what a viewer should remember
Pick one image or action for the ending. Here it is a hand placing the keys down and finally letting go. The camera can return to that action after the performance shots. A clear destination helps you choose between two attractive takes later.
Save the words you will perform
Copy the final lyric version into a rehearsal document. Small changes between the written draft and the recording become visible during a lip-sync performance. Read against the master audio, including breaths and held vowels. If the hook itself still needs revision, settle that before planning footage around it; rap song structure can help you choose a section with a complete musical role.
2. Choose what kind of footage you can finish
Your resources determine which version of the idea is practical. Count the people, places, and time you actually have. A friend holding a phone, a stable chair used as a support, and a quiet room can cover this exercise. A plan requiring several outfits and a night exterior asks for a different schedule.
| Approach | Material you need | What you control | What you should inspect |
|---|---|---|---|
| Film a performance | Performer, recording, camera, location permission | Delivery, framing, gestures, repeat takes | Focus, playback alignment, continuity |
| Build from a generated performance | Permitted portrait, recording, a video tool | Inputs and supported settings; later editing | Identity, hands, mouth movement, unwanted details |
| Make a lyric video | Final recording, corrected words, visual layout | Text timing and design in your editor | Reading speed, line breaks, spelling |
| Combine sources | A performance plus separately filmed details | Shot order, cuts, duration, final sound | Consistency between footage sources |
Choose one approach as the base. If you combine sources, keep their differences intentional. A stylized generated portrait followed by a real close-up of keys can work when both support the idea. An unexplained shift between unrelated faces or rooms can make the viewer wonder whether they are watching the same performance.
A lyric video may be the more practical choice when the words are the main event and you have no suitable performance footage. It still needs careful editing; “only text” does not mean there is no work. Save that decision before spending the afternoon collecting clips that your final format will never use.
3. Draw seven shots that fit thirty seconds
Write each shot as a sentence describing what changes on screen. “Close-up” describes a frame size, but “the keys land on the counter” tells you what to film. Add duration and audio position after the action is clear.
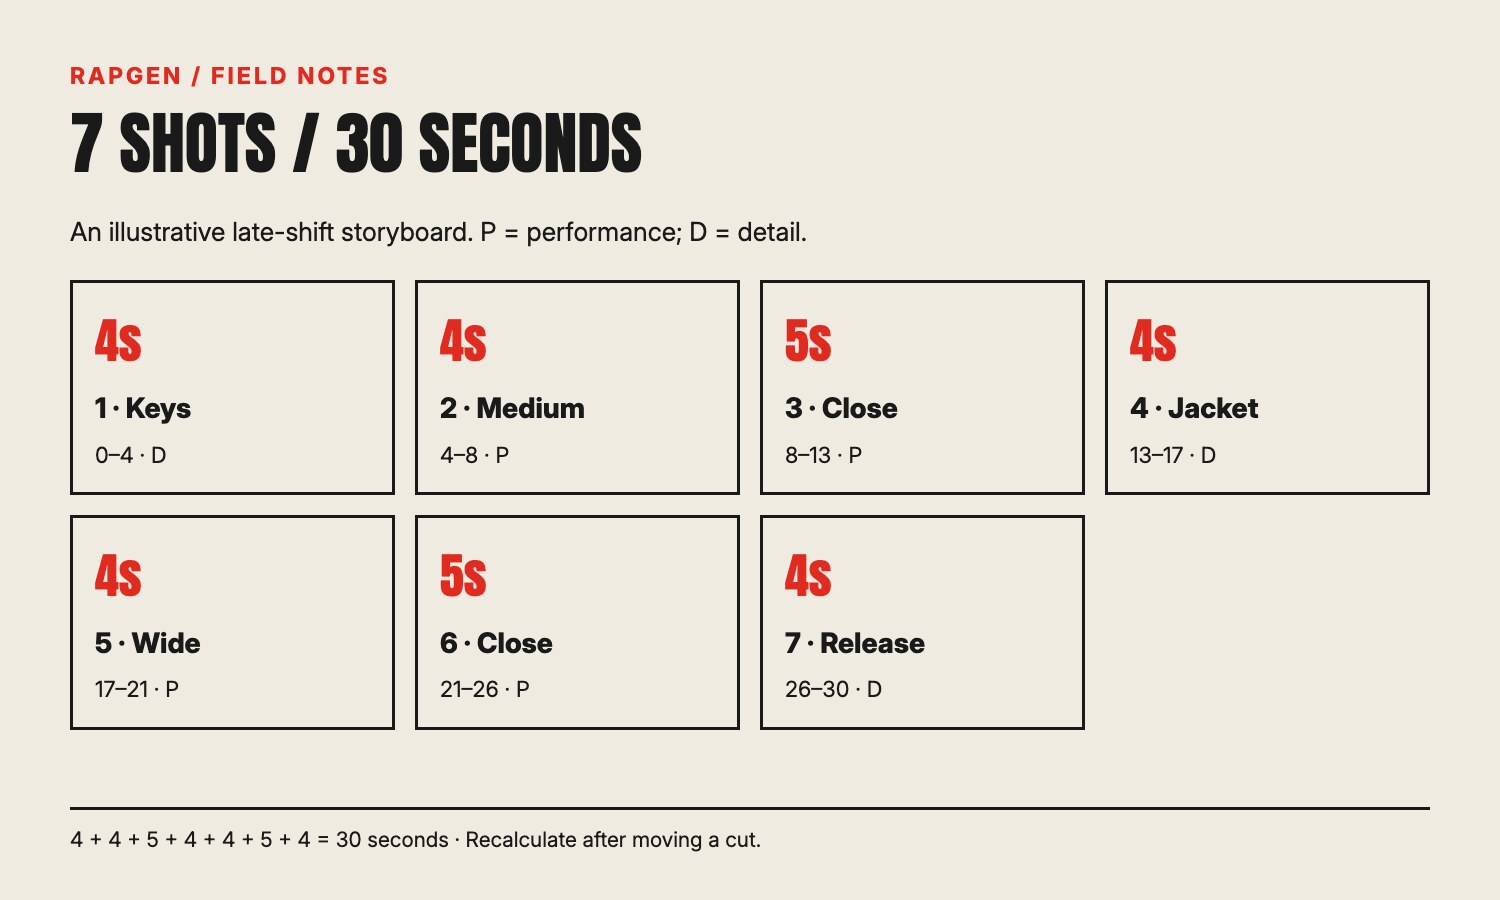
Our board uses seven shots with durations of four, four, five, four, four, five, and four seconds. The sum is thirty seconds. Those are planning intervals, not rules that every rap hook should follow. You may move a cut when the vocal or gesture suggests a better point, then check the total again.
| Shot | Time in the example | Action | Job in the sequence |
|---|---|---|---|
| 1 | 0–4 seconds | Keys enter the frame and land | Establish the return home |
| 2 | 4–8 seconds | Medium performance facing the camera | Introduce the performer |
| 3 | 8–13 seconds | Closer performance on the answering phrase | Bring attention to the delivery |
| 4 | 13–17 seconds | Jacket drops over a chair | Show the transition |
| 5 | 17–21 seconds | Wider performance with a held stance | Give the edit room to breathe |
| 6 | 21–26 seconds | Close performance on the repeated phrase | Return to the hook |
| 7 | 26–30 seconds | Hand releases the key ring | Complete the opening action |
Shots two, three, five, and six can come from complete performance takes. You do not need to stop the recording at every board boundary during filming. Collect a full medium take, a full close take, and a wider take if time allows, then select the usable sections in the edit.
The detail shots are a separate small list: keys entering, jacket falling, hand releasing. The ending returns to the opening key action in a closer view; these shots frame the performance rather than document one uninterrupted action. Film each action more than once so you have a choice of timing. Check the first version before repeating it; an out-of-focus action repeated three times remains unusable.
4. Record an anchor take you can return to
An anchor take is a complete performance of the selected section in a stable framing. Put it on the timeline first. It gives the edit a continuous visual option wherever a detail shot fails or a close-up drifts out of alignment.
For phone filming, place the camera securely and check the image before starting. Avoid a position where the lens is covered by a finger or a bright window overwhelms the face. Play the recording from another device if available and perform to that same file on every take. Keep the playback audible enough to match in the edit without asking the performer to chase a quiet beat.
Use a short count-in before the selected section when rehearsing. If you add it to a filming playback file, keep the original master separately. The final soundtrack should come from your chosen master, rather than the room recording captured by the camera. Room sound is useful for matching the take and can then be muted.
Repeat the section while checking the lyric document. Fast phrases deserve their own rehearsal. A person who knows the words can still move their mouth differently from the recorded delivery, especially when the master has doubled vocals or an ad-lib. Decide which voice the visible performer is representing.
Keep the gesture for the repeated phrase consistent enough to cut between takes. If the right hand is raised in the medium shot and suddenly disappears in the close-up, the cut may feel abrupt. You can choose an intentional discontinuity, but first capture a version that lets you assemble a smooth sequence.
5. Make detail shots earn their place
Watch the anchor take and mark places where a detail could add meaning. In our example, the jacket falling supports leaving the shift behind. A random shot of an expensive object would add a new subject and require an explanation. A detail earns its place when it establishes the setting, changes the action, or gives the vocal a useful visual pause.
Match the important objects
Use the same keys and jacket across the details. Photograph their position after each take if you need to reset it. When a hand enters from the left in one shot and the object moves right in the next, review whether the direction reads as continuous. You can solve many continuity problems by choosing a different take before reaching for a visual effect.
Keep a clean beginning and ending
Leave a little stillness around each filmed action. It gives you room to trim. If the camera begins moving at the exact instant the keys land, the usable action may be too short for the board. Capture the frame, perform the action, and hold the result long enough to inspect it.
Remove accidental subjects
Look at the edge of the frame for people, private documents, and background material you did not intend to show. Get permission for people and locations that appear. If a screen or poster attracts more attention than the performer, change the framing or remove it before filming another take. That is usually less work than trying to obscure it in every frame later.
6. Assemble the sequence against the master recording
Import the master audio and anchor take into your editor. Find an obvious syllable or sound in both recordings and align the take with the master. Inspect a phrase near the beginning and another near the end. Matching one point does not establish that the whole take stays aligned.
Once the anchor plays convincingly, mute its room audio. Keep the master in place while adding details above the performance. That reduces the risk of accidentally cutting the soundtrack whenever you change a visual shot. Save a new project version before making major rearrangements.
Cut where something meaningful happens: the reply starts, the performer turns, the keys touch the counter, or the repeated phrase returns. Every beat does not need a new shot. A held frame can let a strong line finish. Listen to the phrasing rather than treating the waveform as a command to cut at every peak. For practice with vocal placement, how to improve rap flow gives you ways to hear how a phrase moves through the beat.
Compare the close-up and medium take on the same line. Choose the one with clearer expression and timing. You may discover that the broad board needs one fewer switch. The board is a starting plan; the recorded performance supplies new information.
If one source has a different aspect ratio, decide how to fit it before exporting. Cropping can remove a hand or part of the face. Letterboxing can preserve the frame but reduce its size on a phone. Watch the actual choice at normal viewing size, especially when combining generated footage and filmed details.
7. Check the export as a viewer would
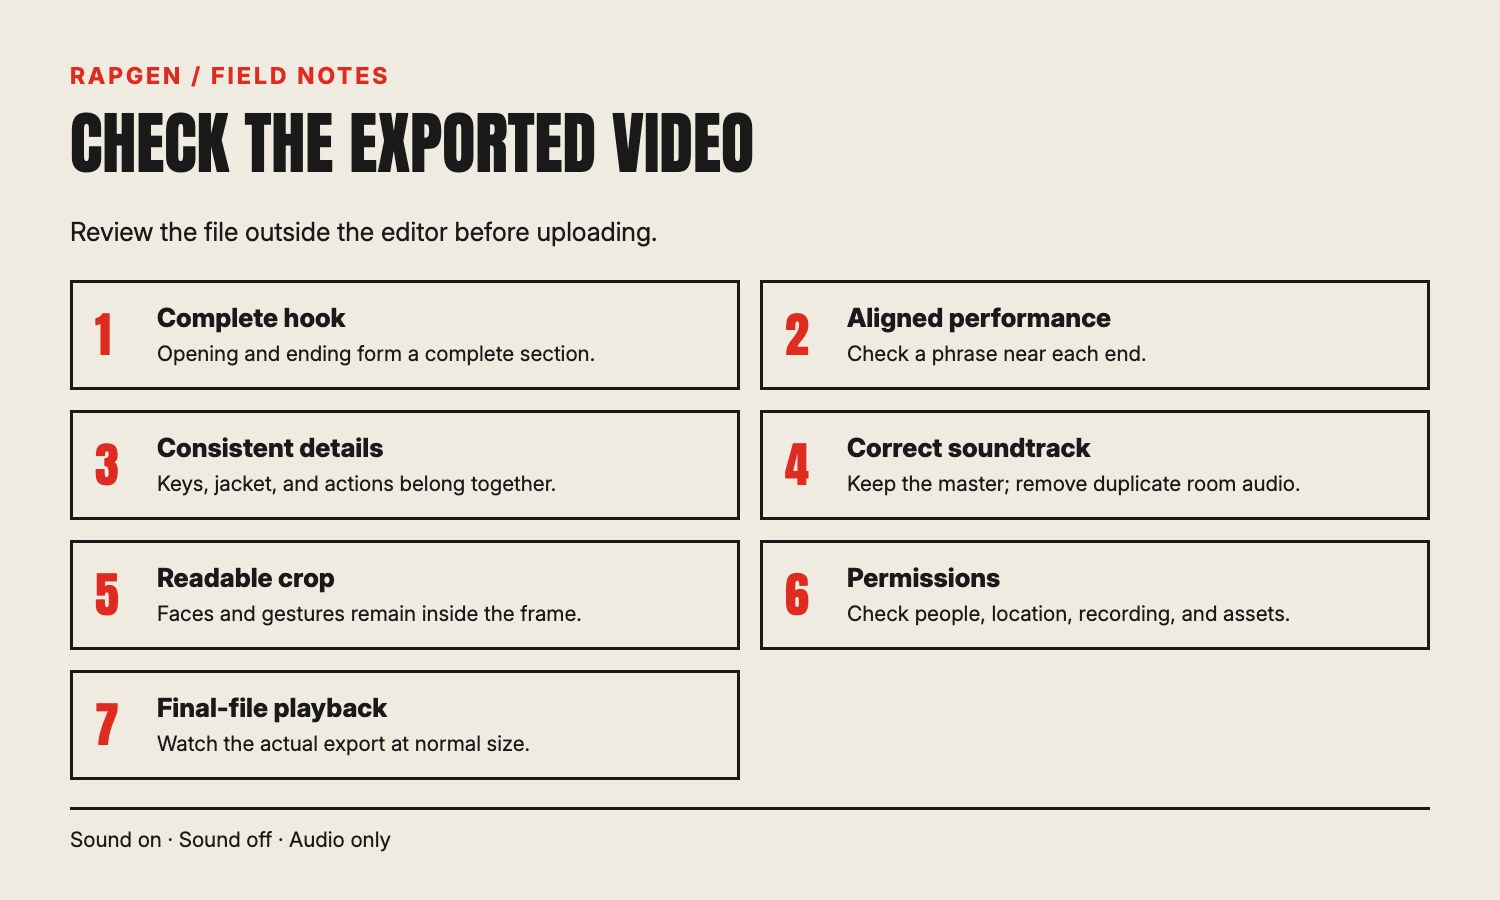
Export a draft and play the file outside the editor. Watch it once without pausing. Then inspect the beginning, the first close-up, the source transitions, and the ending. The exported file is the product your viewer will see; a smooth project preview cannot substitute for checking it.
Use three passes. First, watch with sound and ask whether the section feels complete. Second, watch muted and describe the visible action. Third, listen without looking and check whether the soundtrack remains the intended master. This catches an accidental duplicate room recording that may be less obvious while you are concentrating on cuts.
Show the draft to one person who has not seen the board. Ask them what they remember. “The keys and the late shift” tells you the idea survived. If they only mention a distracting background detail, you have a concrete place to revise.
If AI-generated music is the main focus of your video, or you use realistic synthetic footage, consult the external YouTube guidance on disclosing altered or synthetic content before uploading there. Check the audio as well as the images when applying the current requirements. Also verify your permissions for the recording, portraits, and any other included assets.
Three things you can stop worrying about
Having seven different locations. Seven shots can be collected in one room. Changes in distance, action, and performance can provide enough variation for a short section.
Using every take you recorded. Unused footage is a choice you preserved. Keep the best version of the sequence, even when a difficult shot has no useful place in it.
Matching every lyric with an object. The central action can hold the story while the performer carries the words. Let the recording do part of the work.
Generate a performance source if you need one
The AI rap video generator has a song-based mode for pairing a recording with one portrait. Its supported lengths are fifteen, thirty, and sixty seconds, and that mode retains the portrait's background. Treat the generated clip as footage to inspect; the seven-shot assembly described here happens in your separate editor.
Use a portrait of a consenting adult and a recording you have permission to use. Check the result for recognizable identity and convincing mouth movement, particularly on quick phrases. If your planned edit needs a different location, collect that footage separately or choose another production method.
The short version
To learn how to make a music video, finish one complete section first. Choose the time range, give it a simple action, draw seven shots, and record an anchor performance. Add details where they serve the hook, align the edit to the master, and review the exported file. Extend the plan after that first sequence works.